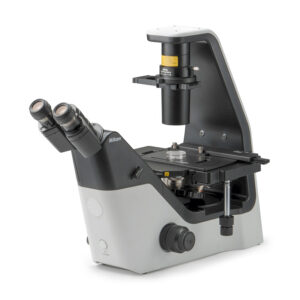
About this instrument
- inverted fluorescence microscope with phase contrast
- Nikon 4x Plan Achromat objective
- Nikon Achromat 10x, 20x (LWD), and 40x (LWD) Phase contrast objectives
- Contrast shield for imaging fluorescence with room lights on
- 3 LEDs for imaging DAPI, GFP, and TxRed
- DAPI filter (EX 377/50, DM 409, BA 447/60)
- GFP (EX 469/35, DM 497, BA 525/39)
- TXRed filter (EX559/34, DM585, BA630/69)
- monochrome camera, 1/1.2″ Sony Pregius CMOS sensor with 2,3Mp resolution (1920 x 1200)
- Windows SurfacePro tablet with image acquisition software ´IC measure’
- docking station with USB port for image export
Quick start
Visual observation
- Turn microscope on with the power switch located on left side
- Manually select the objective and the filter set you want to use.
- There are three filter sets labelled by the excitation wavelength.
- The positions for transmitted light marked by the light bulb symbol.
- Use the buttons at the front to select between transmitted light illumination (DIA) or fluorescence excitation (EPI). Use the same buttons to turn the illumination On/Off
- The illumination intensity is set by the knobs on the left-hand side for transmitted light and on the right-hand side for fluorescence excitation.
- Check the lever next to the eyepiece that toggles between eyepiece and camera view.
- When imaging fluorescence under normal ambient light in the room, close the cover above the stage to avoid increased background.
- To use phase contrast, insert the phase mask slider to the condenser.
- The slider has 3 positions for different objective magnifications. Use the central one for 10x and 20x and the largest phase mask for 40x objective. Make sure the condenser aperture is fully open for phase contrast.
Taking pictures
- open program ‘IC measure’ on tablet
- Use the lever next to the eyepiece to toggle between eyepiece and camera view
- image acquisition is described here
- insert USB into the dock and save your images- please do not leave images on the tablet